Install
Just want to see it work?
The public demo at
https://demo.proxiport.net/ lets
you sign in (demo / demo) and explore an Inventory of three
pre-registered agents without installing anything. State resets
every hour.
ProxiPort has two pieces: the server (proxiportd) and the agent
(proxiport). One server reaches many agents; the agent dials the server
over an outbound WebSocket, so it works behind NAT without inbound
firewall rules.
This page covers a single-server install on Linux and a single Linux agent. macOS and Windows agents follow the same shape with the platform-native service manager.
Server
Requirements
- Linux x86_64 or arm64 with systemd.
- A public hostname pointed at the host. The Pick a public listener step below walks through the three TLS setups (built-in ACME, manual cert, reverse proxy) — all of them need a hostname.
- Ports 80 and 443 reachable from the network you want agents to connect from (80 for the agent listener and ACME HTTP-01 challenges, 443 for the TLS API).
- SQLite is the default datastore; MySQL is also supported.
Install
Each release on the
GitHub releases page
ships the server for linux/amd64 and linux/arm64 in three formats:
- Debian/Ubuntu
.deb—proxiportd_<ver>_linux_<arch>.deb - Fedora/RHEL/openSUSE
.rpm—proxiportd_<ver>_linux_<arch>.rpm - Tarball —
proxiportd_<ver>_linux_<arch>.tar.gz, for other distributions
Asset filenames carry the version; the snippets below resolve the
latest tag from the GitHub API before downloading. Substitute arm64
for x86_64 on aarch64 hosts.
Debian / Ubuntu
VER=$(curl -fsSL https://api.github.com/repos/proximile/proxiport/releases/latest \
        | sed -n 's/.*"tag_name": *"\([^"]*\)".*/\1/p')
curl -LO "https://github.com/proximile/proxiport/releases/download/${VER}/proxiportd_${VER#v}_linux_x86_64.deb"
sudo dpkg -i "proxiportd_${VER#v}_linux_x86_64.deb"
Fedora / RHEL / openSUSE
VER=$(curl -fsSL https://api.github.com/repos/proximile/proxiport/releases/latest \
        | sed -n 's/.*"tag_name": *"\([^"]*\)".*/\1/p')
sudo rpm -ivh "https://github.com/proximile/proxiport/releases/download/${VER}/proxiportd_${VER#v}_linux_x86_64.rpm"
Tarball (other distributions)
VER=$(curl -fsSL https://api.github.com/repos/proximile/proxiport/releases/latest \
        | sed -n 's/.*"tag_name": *"\([^"]*\)".*/\1/p')
curl -LO "https://github.com/proximile/proxiport/releases/download/${VER}/proxiportd_${VER#v}_linux_x86_64.tar.gz"
tar xzf "proxiportd_${VER#v}_linux_x86_64.tar.gz"

sudo install -m 0755 proxiportd /usr/bin/proxiportd
sudo install -d /etc/proxiport
sudo install -m 0644 proxiportd.example.conf /etc/proxiport/proxiportd.conf
sudo install -m 0644 proxiportd.service /lib/systemd/system/proxiportd.service
# The web UI, root-owned where only root can write; the config's
# doc_root default already points here.
sudo install -d -o root -g root -m 0755 /usr/share/proxiport
sudo cp -r docroot /usr/share/proxiport/docroot
sudo chown -R root:root /usr/share/proxiport/docroot
sudo chmod -R u=rwX,go=rX /usr/share/proxiport/docroot

sudo useradd --system --home /var/lib/proxiport --shell /usr/sbin/nologin proxiport || true
getent group ssl-cert >/dev/null || sudo groupadd --system ssl-cert
sudo install -d -o proxiport -g proxiport -m 0750 /var/lib/proxiport
sudo install -d -o proxiport -g proxiport -m 0750 /var/log/proxiport
sudo setcap CAP_NET_BIND_SERVICE=+eip /usr/bin/proxiportd
sudo systemctl daemon-reload
The ssl-cert group is listed in the unit's SupplementaryGroups so
the daemon can read certbot/manual TLS keys — systemd will not start
the service if the group is missing. setcap ships in libcap2-bin
(Debian/Ubuntu) or libcap (RHEL-family) if your base install lacks
it.
Tarball installs do not auto-generate secrets or seed the config; the Configure step below covers what to set by hand.
Building from source
If none of the published artefacts fit your platform — or you want a container image, which we do not publish — build from source:
go install github.com/proximile/proxiport/cmd/proxiportd@latest
The server needs CGO (CGO_ENABLED=1) for the embedded SQLite. The
agent is pure Go.
go install builds the server binary only. The web UI is a separate
build — npm install && npm run build in frontend/ writes the build/
directory that the packages ship as docroot — so point [api]
doc_root at a copy of it (or at the docroot directory from a release
tarball), or the API will answer while the browser gets nothing.
The version string is injected at release time via linker flags, so a
plain go build / go install reports 0.0.0-src for
proxiportd --version (and proxiport --version). That is expected — to
stamp a real version into a source build, pass the ldflag yourself, with
the version of the tag you checked out:
git checkout v0.11.1
go build -ldflags "-X github.com/proximile/proxiport/share.BuildVersion=0.11.1" \
./cmd/proxiportd
Stamp a semantic version (x.y.z, optionally with a -suffix), never
a bare commit hash. An agent reports its version on every connection, and
servers up to v0.11.1 refuse an agent whose version they cannot parse from
its second connection onward — such an agent connects once and never
reconnects. The agent logs an error at start when its build version would
not parse.
Quick setup with proxiport-setup
If this is a single-host install with a public hostname pointed at it,
the proxiport-setup script bundled with the .deb / .rpm does
everything below in one command:
sudo proxiport-setup --fqdn proxiport.example.com
It mirrors the upstream openrport curl-bash installer: takes --fqdn,
--email, --api-port, --client-port, --client-url, --port-range,
--totp / --no-2fa, --skip-nat (skip the public-IP check),
--assume-yes and --show-secrets for unattended runs, and
--uninstall; opens UFW or firewalld rules; rewrites proxiportd.conf to
bind :80 for agents and :443 for the API; turns on built-in ACME if
the hostname is publicly resolvable (or accepts --cert-file /
--key-file for an existing PEM pair); creates a SQLite
users/groups/group_details/clients_auth schema with a
bcrypt-hashed random admin password; enables TOTP 2FA by default;
starts proxiportd; and prints the admin URL and credentials.
If that fits your install, jump to Log in. If you want to lay it out by hand, read on — the remaining sections walk through exactly what the script automates.
What just happened
The .deb / .rpm post-install ran four steps the operator otherwise
has to do manually:
- generated a random ECDSA
key_seed, JWT signing secret, admin password, and first agent credential — all written into/etc/proxiport/proxiportd.confin place of the example placeholders; -
recorded the admin and client-auth credentials in two files under
/var/lib/proxiport/:/var/lib/proxiport/initial-admin-password # SPA login /var/lib/proxiport/initial-client-auth # first agent's auth pairBoth files are mode
0600 proxiport:proxiport— owned by the account the server runs as, so that it can destroy them. Read withsudo cat. They are shredded from disk the first time an admin logs in with a password, so retrieve them and store the credentials in a password manager before that first login.Before 0.10.0 they were
0640 root:proxiport, which the daemon could not open for writing — so the shred failed silently and the cleartext credentials stayed on disk. An upgrade re-owns any files it finds. -
granted
CAP_NET_BIND_SERVICEon/usr/bin/proxiportdso the unprivilegedproxiportuser can bind ports 80 and 443; - created
/var/lib/proxiport(state) and/var/log/proxiport(logs) withproxiportownership.
The server is not yet enabled. The seeded config binds the API to
127.0.0.1 only, so nothing is reachable from the network until the
next step (or until you run proxiport-setup, which handles all of
this in one shot).
At-rest field encryption is off by default, so the seeded
totp_secret column, the vault, and the freshly generated key_seed /
jwt_secret in the config are all stored unencrypted. To wrap them
under a server-held key, configure a [key_provider] — see the
[key_provider] section of proxiportd.example.conf,
encrypting the config secrets,
and Two-factor authentication.
Pick a public listener
The seeded config leaves [api] address = "127.0.0.1:3000" so nothing
is exposed off-box until you choose how TLS will be served. There are
three working setups; pick one and edit /etc/proxiport/proxiportd.conf
accordingly. Full walk-through with worked examples is in
HTTPS.
Single-purpose host with a public DNS A record pointing at it and
port 80 reachable from the internet for Let's Encrypt's HTTP-01
challenge. proxiportd obtains and renews the certificate itself.
[api]
address = "0.0.0.0:443"
base_url = "https://proxiport.example.com"
enable_acme = true
Bring your own cert + key (certbot --manual, internal CA, anything
PEM). Both files must be readable by the proxiport system user.
[api]
address = "0.0.0.0:443"
base_url = "https://proxiport.example.com"
cert_file = "/etc/proxiport/tls/fullchain.pem"
key_file = "/etc/proxiport/tls/privkey.pem"
nginx / Caddy / Traefik terminates TLS upstream and forwards plain
HTTP to proxiportd over loopback. Keep address = "127.0.0.1:3000"
in the seeded config and point your proxy at it. See
HTTPS for the directives
each proxy needs for the WebSocket upgrade.
Open the firewall
Wherever your server runs there is probably one host-level firewall and one cloud-level firewall. Both need port 80 (for the agent listener and ACME HTTP-01) and 443 (for the TLS API), unless you went with the reverse-proxy option.
sudo ufw allow 80/tcp
sudo ufw allow 443/tcp
sudo firewall-cmd --add-service=http --permanent
sudo firewall-cmd --add-service=https --permanent
sudo firewall-cmd --reload
On hyperscalers the host firewall above only opens the kernel —
the cloud's network firewall is what the public internet sees. Add
inbound TCP rules for 80 and 443 to the droplet's Cloud
Firewall (DO), the instance's Security Group (AWS), or the VPC
firewall (GCP).
Enable the service
sudo systemctl enable --now proxiportd
sudo systemctl status proxiportd
If the unit fails to start, journalctl -u proxiportd -n 50 shows
why — the most common causes are an [api] address that's already in
use, a base_url whose hostname does not resolve, or cert_file /
key_file paths the proxiport user cannot read.
Log in
Read the random admin password generated at install time:
sudo cat /var/lib/proxiport/initial-admin-password
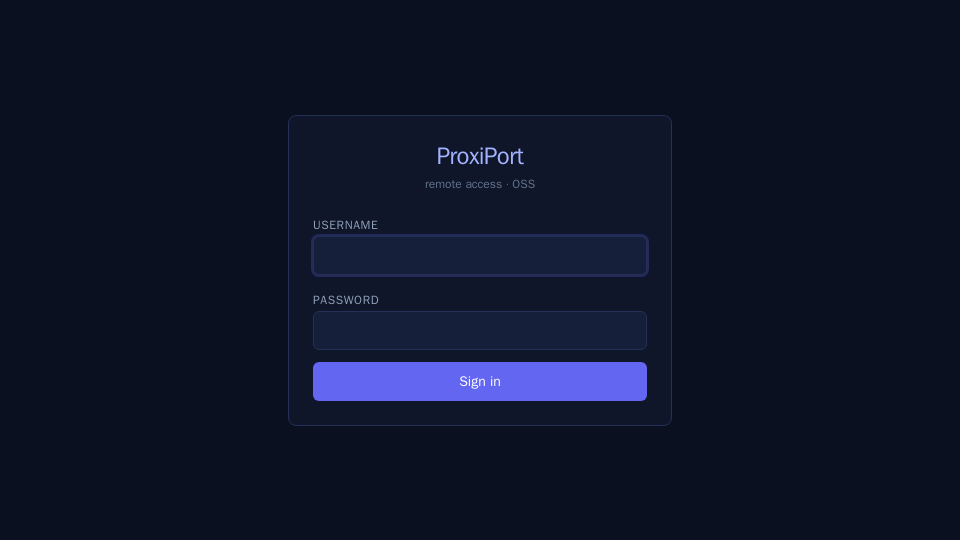
Open https://<your-host>/ in a browser and sign in. Rotate the
password from the Profile screen once you're in.
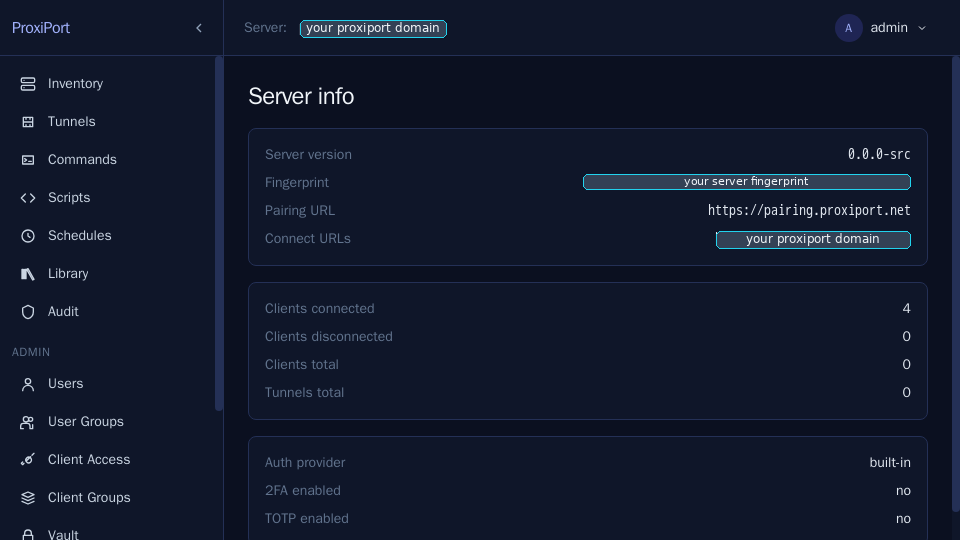
The Info page is where the host-key fingerprint and the Connect-URL list live — both are needed when configuring agents.
Agent
Requirements
- Linux / macOS / Windows.
- Outbound TCP from the agent host to the server's
[server]listener — port 80 in the seeded default. Agents never accept inbound connections, so no firewall changes are needed on their side.
Install
The fastest way to bring up a new agent is the pairing service at
pairing.proxiport.net: the operator
posts the agent's credentials, the service mints a one-shot pairing
code, the agent host runs
curl https://pairing.proxiport.net/<code> | sudo sh
and the installer drops a working binary plus proxiport.conf into
place. Source for the pairing service: https://github.com/proximile/proxiport-pairing.
When you generate a pairing code from the web UI, the server brokers the
request: the browser posts to POST /api/v1/pairing on your own server
(same origin, using your session), and the server forwards it to the pairing
service. This means pairing works from any deployment's own hostname, and
your server needs outbound network access to pairing_url (the
pairing.proxiport.net default, or your own instance). Set pairing_url = ""
in the server config to disable the pairing button entirely.
To bring an agent up over Tor or a VPN from the start, the installer takes
-o and -e; see Installing with the pairing
script.
The agent ships in the same three package formats as the server, plus
tarballs for a wider platform list: Linux (amd64, arm64, i386, armv6,
armv7, riscv64, ppc64, ppc64le, loong64, s390x, and
mips/mipsle/mips64/mips64le hard- and softfloat), macOS (amd64, arm64),
Windows (amd64, as a zip), FreeBSD (amd64, arm64, armv6, armv7, i386),
OpenBSD (amd64, arm64, i386) and NetBSD (amd64, arm64). .deb and
.rpm are published for every Linux variant.
Manual install — Debian / Ubuntu
VER=$(curl -fsSL https://api.github.com/repos/proximile/proxiport/releases/latest \
| sed -n 's/.*"tag_name": *"\([^"]*\)".*/\1/p')
curl -LO "https://github.com/proximile/proxiport/releases/download/${VER}/proxiport_${VER#v}_linux_x86_64.deb"
sudo dpkg -i "proxiport_${VER#v}_linux_x86_64.deb"
Manual install — Fedora / RHEL / openSUSE
VER=$(curl -fsSL https://api.github.com/repos/proximile/proxiport/releases/latest \
| sed -n 's/.*"tag_name": *"\([^"]*\)".*/\1/p')
sudo rpm -ivh "https://github.com/proximile/proxiport/releases/download/${VER}/proxiport_${VER#v}_linux_x86_64.rpm"
Manual install — tarball (other platforms)
VER=$(curl -fsSL https://api.github.com/repos/proximile/proxiport/releases/latest \
| sed -n 's/.*"tag_name": *"\([^"]*\)".*/\1/p')
curl -LO "https://github.com/proximile/proxiport/releases/download/${VER}/proxiport_${VER#v}_linux_x86_64.tar.gz"
tar xzf "proxiport_${VER#v}_linux_x86_64.tar.gz"
sudo install -m 0755 proxiport /usr/bin/proxiport
sudo install -d /etc/proxiport
sudo install -m 0644 proxiport.example.conf /etc/proxiport/proxiport.conf
sudo install -m 0644 proxiport.service /lib/systemd/system/proxiport.service
# The agent's own account and directories. `proxiport-agent` is NOT the
# server's `proxiport`: the agent executes operator-supplied commands as its
# own uid, so sharing one account would put it inside the server's trust
# boundary on any host carrying both.
sudo useradd --system --home /var/lib/proxiport-agent \
--shell /usr/sbin/nologin proxiport-agent || true
sudo install -d -o proxiport-agent -g proxiport-agent -m 0750 /var/lib/proxiport-agent
sudo install -d -o proxiport-agent -g proxiport-agent -m 0750 /var/log/proxiport-agent
sudo chown root:proxiport-agent /etc/proxiport/proxiport.conf
sudo chmod 0640 /etc/proxiport/proxiport.conf
sudo systemctl daemon-reload
Configure the agent
Edit /etc/proxiport/proxiport.conf and set three fields:
[client]
server = "your-proxiport-server.example.com:80"
auth = "<client-auth-id>:<password>"
fingerprint = "<server-host-key-fingerprint>"
server— the address the agent dials. Port should match what the proxiportd[server]listener was bound to; the seeded default is 80.auth— pull the first credential off the server withsudo cat /var/lib/proxiport/initial-client-auth, or any later credential you've created. Both halves of<id>:<password>go in.fingerprint— the proxiportd host-key fingerprint, printed in the server's log on first boot and shown on the SPA's Info page. Without it, the agent will accept whatever public key the server presents — fine for testing, never for production. Prefer the SHA-256 value (starts withSHA256:): the agent matches it in full, in constant time. The legacy MD5 colon-hex form still works but is deprecated.
Then start the service:
sudo systemctl enable --now proxiport
The agent connects, registers, and waits for tunnel-open requests from the server. It reconnects automatically.
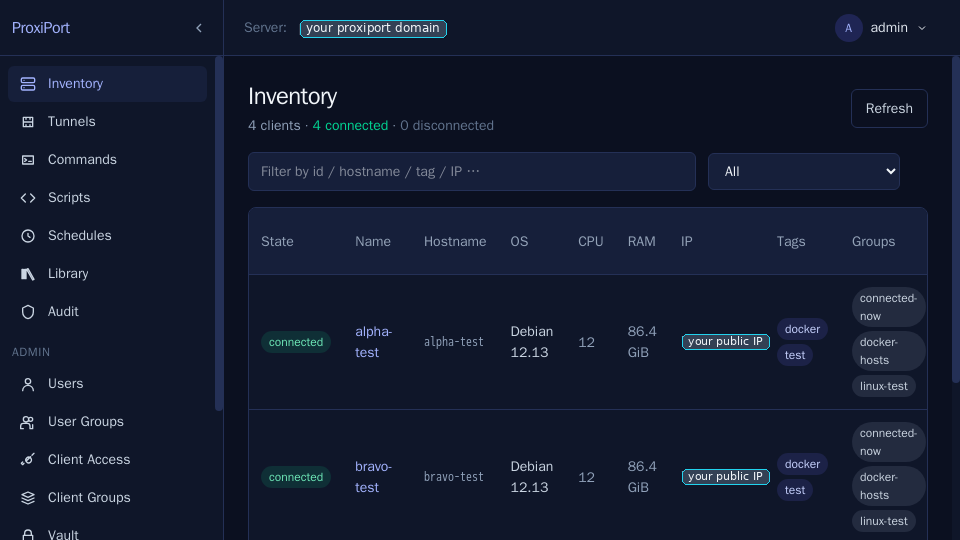
Refresh the SPA. The new agent shows up in the inventory.
Upgrading
Install the new package over the old one. The state in
/var/lib/proxiport and your /etc/proxiport/*.conf are left alone;
only the binaries, the unit files and the bundled SPA are replaced. The
one exception is the doc_root rewrite described under
Upgrading to v0.11.1 or later, and it only
touches the shipped default value.
curl -fsSLO https://github.com/proximile/proxiport/releases/latest/download/proxiportd_<version>_linux_x86_64.deb
sudo dpkg -i proxiportd_<version>_linux_x86_64.deb
sudo rpm -Uvh proxiportd_<version>_linux_x86_64.rpm
A service that was running is restarted automatically at the end of the upgrade; one that was stopped stays stopped. Check it came back:
systemctl status proxiportd
proxiportd --version
Upgrading from v0.8.3 or earlier
Packages up to v0.8.3 disabled and stopped both services during every upgrade, including unattended ones, and never restarted them — the server stayed down until someone noticed. Upgrading to v0.8.4 still runs the old package's hook, so re-enable it once, after which upgrades keep the service running:
sudo systemctl enable --now proxiportd
Upgrading from v0.9.x or earlier to v0.10.0: shrink the monitoring log file
Before v0.10.0 the server rewrote monitoring.db on every start,
which left a write-ahead log (monitoring.db-wal) next to it as
large as the database itself — gigabytes on a busy fleet. v0.10.0
stops the rewrite, but it only shrinks a log that is already there
after its first daily compaction, which happens once the server
has run for 24 hours without a restart. Shrink it once, by hand,
right after the upgrade:
ls -la /var/lib/proxiport/monitoring.db* # note the -wal size
sudo systemctl stop proxiportd
sudo -u proxiport sqlite3 /var/lib/proxiport/monitoring.db \
'PRAGMA wal_checkpoint(TRUNCATE);'
sudo systemctl start proxiportd
ls -la /var/lib/proxiport/monitoring.db* # -wal is now small
The command prints 0|0|0 on success. A first value of 1 means
the server was still running and nothing was shrunk: stop it and
run the command again. It needs the sqlite3 command-line tool
(sudo apt-get install sqlite3, or sudo dnf install sqlite).
The data stays intact: the log is folded into monitoring.db before
it is truncated. Releases after v0.10.0 do this themselves every time
the server starts, so upgrading straight to one of them needs no
manual step.
Upgrading an agent from v0.9.x or earlier
v0.10.0 gave the agent its own account, proxiport-agent, and moved
its default data_dir from /var/lib/proxiport to
/var/lib/proxiport-agent. The packages create both. An agent that
was installed by hand, runs as some other account and has no
data_dir line of its own falls back to the new default after the
upgrade and refuses to start with
failed to create data_dir "/var/lib/proxiport-agent": permission denied.
Either set data_dir in [client] to the directory that account
already owns, or move the agent to the proxiport-agent account as
shown under
Manual install — tarball.
Downgrading is the same command with an older package. The client
database schema is versioned and migrated forward on start, so a
downgrade across a schema change is not supported — snapshot
/var/lib/proxiport first if you intend to go back. Going back below
v0.11.1 also needs doc_root set back by hand (see the next section).
Upgrading to v0.11.1 or later
v0.11.1 moves the bundled web UI out of the server account's data directory into a root-owned tree, so that a process running as the server account can no longer rearrange what the next package upgrade unpacks as root.
- The SPA now lives at
/usr/share/proxiport/docroot(root-owned, read-only for the daemon). The old/var/lib/proxiport/docrootis removed by the package manager; anything else left there is unused. - If
[api] doc_rootin/etc/proxiport/proxiportd.confis still the shipped default"/var/lib/proxiport/docroot", the package rewrites it to the new path. Any other value is left alone; if it still points at the old path the upgrade prints a warning and the web UI stays dark until you setdoc_root = "/usr/share/proxiport/docroot"and restartproxiportd. - Debian and Ubuntu print
dpkg: warning: unable to delete old directory
  '/var/lib/proxiport': Directory not empty
once during this upgrade. That is expected: the old package listed the data directory, the new one does not, and the directory holds your state. - The upgrade restarts a running
proxiportdat the end, as before. On Debian and Ubuntu the old UI files are gone from the moment the package is unpacked until that restart, so the web UI returns 404 for a few seconds during the upgrade. - To downgrade to v0.11.0 or earlier afterwards, set
doc_rootback to"/var/lib/proxiport/docroot"first; the older package installs the UI there again but does not edit the configuration.
Upgrading from a v0.1.2 install
v0.1.3 changes two things that already-running v0.1.2 installs do not
pick up automatically — the package postinstall deliberately leaves an
existing /etc/proxiport/proxiportd.conf alone.
[api] addressdefault moved from0.0.0.0:3000to127.0.0.1:3000. v0.1.2 servers that have always relied on the example config will still listen on 3000 publicly until you switch them onto one of the three public-listener profiles above. Until then, the API is reachable on plain HTTP, which is exactly what the v0.1.3 defaults are meant to stop.- Random secrets and initial credential files are only generated on
first install. If you set
key_seed/jwt_secret/[api] authyourself when bringing v0.1.2 up, nothing to do. If you left them at the example placeholders (<YOUR_SEED>,<YOUR_SECRET>,admin:foobaz,clientAuth1:1234), generate replacements manually before upgrading —openssl rand -hex 32for the seed,openssl rand -base64 24for the JWT secret, anything strong for the auth strings.
Otherwise the upgrade is dpkg -i / rpm -Uvh of the new package and
systemctl restart proxiportd. Config schema is unchanged.
Migrating from rport or openrport
ProxiPort's config file format is intentionally compatible with the
upstream rportd.conf and rport.conf. Tags and option names are
unchanged where the underlying behaviour is unchanged.
To migrate:
- Stop the upstream service (
rportdoropenrportd). - Install ProxiPort using the Debian/Ubuntu, Fedora/RHEL, or tarball path above.
- Copy your existing
rportd.confto/etc/proxiport/proxiportd.conf. - Start
proxiportd. - On each agent, replace the upstream binary, copy the config to
/etc/proxiport/proxiport.conf, and startproxiport. Re-issue thefingerprintif the server's host key has changed.
The datastore schema is forwards-compatible from the openrport tree; ProxiPort runs any pending migrations on first start.
What does not change from upstream
- Config file format — TOML, structurally compatible with
rportd.conf/rport.conf. - Tunnel transport defaults — chisel over WebSocket. Serve it
over TLS in production (built-in
cert_file/enable_acmeon the server, or an external reverse proxy — see HTTPS). - Datastore — SQLite by default, MySQL supported.
- REST API surface — the same endpoints, the same response shapes. See the API reference.